Saturday, 9 March 2013

French Almond Cake

Ahhhh... with Dad's birthday today, instead of the usual bakewell tart, I thought i'd try something a little different... I found this fab recipe by Linda Collister from her Easy Cake Recipe book.  I read a lot about the almonds in the cake perhaps burning around the edges of the cake, so I tried a bit of forward preparation with foil over the top and a hole in the centre - worked just as well... :-)  Also, I replaced the vanilla essence with almond essence to extenuate the almond flavouring which goes down very well in my house! 
Happy Birthday Dad.... :-) 


Ingredients
8" cake pan

110g unsalted butter, cut into small cubes and leave to soften
140g caster sugar
3 eggs, lightly beaten
90g ground almonds
40g self-raising flour
1 tablespoon milk
1 teaspoon almond extract
1 tablespoon flaked almonds for sprinkling

Method
1.Pre-heat oven at 180C. Grease with butter and flour the sides of an 8" cake pan, line the base with parchment paper, set aside.
2.Place butter, sugar and eggs in a mixing bowl, add almond powder, flour, milk, almond extract then beat with an electric mixer. When light and fluffy, spoon into the prepared pan and spread the batter evenly. Sprinkle the flaked almonds over the top.
3.Bake at 180degC for 35 mins, or until the sponge just springs back when pressed (check when skewer inserted comes out clean.) (
Important Note: Cover the top with foil.  You can make a hole in the centre.  Leave foil on cake for about 15-20mins into baking to prevent the top from burning.

4.Run a thin bladed knife around the sides of the pan to loosen the cake, then turn out onto a wire rack and let cool.

            Recipe source: adapted from Easy Cakes by Linda Collister


Tuesday, 5 March 2013

Buttery Lemon Cookie

So with a few lemons to spare in the larder...... yes, that's it.. They have to be for these delicious melt in the mouth cookies.  I have previously tried a combination of orange with a little cinnamon for Christmas, but these are by far such a lovely buttery lemon flavour which i'm sure I will be visiting again.  Besides the slight chilling time, I hurried this up by popping the dough in the freezer and all seemed to go to plan..  Needless to say, these didn't last long and they had a lovely texture still the following day.  I would recommend storing them in a airtight container once they have completely cooled down.. :-) 


Sunday, 3 March 2013

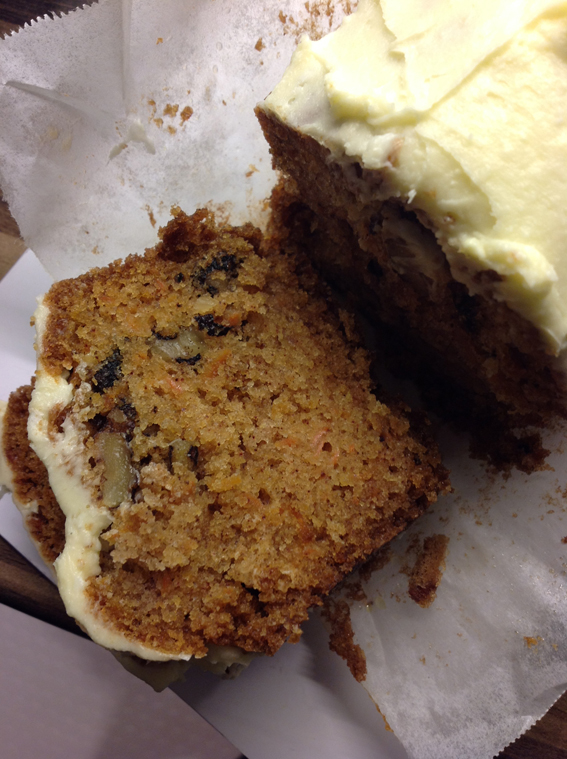
Easy Carrot and Walnut Cake


 So, just another day in my kitchen.... and I have baking rather than blogging, so hopefully I can share some goodness with you all.
I sometimes become quite put off with oil based recipes, as they can turn out a little oily (as it were!) but this is just a lovely balanced recipe and although moist and tasty, not in an oily kind of way!! You get me!
I used an 9inch loaf pan for this, but you could equally make this in an 8inch tin (which could be cut, sandwiched and layered with frosting.  


Ingredients
  • 300g plain flour
  • 300g light brown sugar
  • 3 Eggs
  • 300ml Canola oil
  • 300g carrots, grated
  • 1 tsp Bicarbonate of Soda
  • 1 tsp Baking Powder
  • 1 tsp Mixed Spice
  • ½ tsp Salt
  • 1 tsp Vanilla Extract
  • 100g chopped walnuts or pecan if preferred
Cream cheese frosting
  • 225g cream cheese
  • 50g softened trex
  • 50g icing sugar
  • a few drops lemon extract

Method

1) Preheat the oven to 170 degrees C.
2) Put the eggs, oil and sugar in a bowl and whisk until combined. Add and mix all the ingredients, except for the carrots and walnuts until they are thoroughly incorporated.
3) Add the carrots and walnuts and mix.  
4) Pour the mixture into the desired greased and lined cake tin/loaf pan and bake in the oven for 45 minutes.  The cake should be slightly brown on top.  Leave to cool for 5 minutes and transfer to a wire rack.
5) Combine all the ingredients for the frosting until soft, light and fluffy.  
6) Ensure the cake is completely cooled before adding the topping with a palette knife.


Thursday, 28 February 2013

My Favourite Shortbread Recipe..

This is one of those recipes which I visit time and time again.... Yes, Delia's Smith's Shortbread!  So simple to get right and with a little creativity, anything can be added to these.  I made two batches - a version with some chopped almonds and the bars which were a hazelnut and cranberry variety.  The semolina in this recipe also adds that lovely crunch and gives them more of a surprise texture, rather some of the shop bought ones which are a little too smooth for my liking.  
Straight out of the oven and a dredge of caster sugar sprinkled on top!
I find that the tart tins are just perfect for these and why not have a go with a regular cake tin with removable base.  I use both for baking these shortbread.  


Shortbread with finely chopped almonds baked in a removable base cake tin. Simple! :-) 


Sunday, 10 February 2013

Black Forest Pavlova

One of my all time favourites - black forest gateau and what better way to recreate this.  I recently found this yum recipe on pinterest and had to give it a go.  I am not usually a fan of meringues and often find them a little too sweet but this combination with the tartness of the cherries and the espresso flavoured cream is a real winner!!  Well, this recipe made a huge pavlova which could easily cater for 12-15 people, so when there were only 7 of us to share this between, we were definitely going up for seconds! 

Ingredients

(Meringue)
8 egg whites
500g granulated sugar
2 tablespoons cocoa powder
2 teaspoons vanilla essence

(topping)
500ml whipping cream
2 tablespoons espresso coffee
1 tin of morello cherries
100g roughly chopped walnuts
250g chocolate (milk or dark) shaved/grated

Preheat the oven to 220 degrees C
1.Line greaseproof paper onto 2 baking sheets or, if you have the silicone mats, these are much easier to work with.
2.  Using a stand mixer with whisk attachment, beat the egg whites until they are almost stiff and gradually add the sugar.  Keep mixing until they are stiff.  The best way to test this is to the hold the bowl upside down!
3. Carefully add the cocoa powder and using a metal spoon, gently fold through to create a streaky effect.


 4. Add the meringue to the 2 baking sheets and roughly keep them to 25cm round circles.

5.  Turn the tempertaure of the oven down to 120degrees C and place the meringues to the oven.  Bake for 90 minutes and turn off the heat.  Keep the meringues in the oven until they have completely cooled.  They should now be firm.  Carefully remove from the baking sheets.

The topping and assembly -  
1.  Drain the cherries keeping the juicy syrup.  On a low heat, heat the syrup until it has thickened. Set this aside.
2.  Whip the cream until it has thickened.  Add the espresso and incorporate.  
3.  Carefully spread half of the cream onto the base layer of meringue.  Add 50g walnuts and half of the cherries.  Sprinkle over 125g chocolate.
4.  Place top layer of meringue on top and repeat the process.  Drizzle the cherry syrup over the pavlova.


Tuesday, 5 February 2013

Cheese Black Pepper Heart Biscuits


Now for my real weakness..... Savoury snacks and nibbles.  Once I start, I can't stop.  These quick little snacks went down very nicely but it was just an after thought about how great they would be with little toppings for a perfect party appetizer, or perhaps with a dollop of chutney at the end.
Once again, little Maya got stuck right in and was helping with the rolling and cutting.  It was such great fun for her and I on the otherhand felt quite pleased that she was not trying to pinch any, as she would have done had they been of the sweet variety!!

Friday, 1 February 2013

Vanilla Fudge Recipe


In search for a great fudge recipe, this one definitely hit the spot on all fronts.   The creaminess and smooth texture was definitely a winner.  I have tried many which use condensed milk but this traditional recipe was well worth the effort.  Yes, it will take a good thirty to forty minutes of continuous stirring but the results are divine!  It will also keep fresh for around a week in an airtight container, should that be an issue!

So, it all start off with the following ingredients -
(Makes 24 pieces)

350g granulated sugar
100g butter
250ml whole milk
50ml double cream
2 tspn vanilla extract or your choice of flavouring

You will need a candy thermometer for this and I used a 8" cake tin, but a tray will do an equally as good job, dependent on the thickness you require.

Method
Line and grease your tin/tray with greaseproof paper.
Add the milk, cream, butter and sugar to a large saucepan and begin to heat slowly.  You will need to keep stirring this continuously.  Keep going (!) until the mixture comes to the boil.  Do not be tempted to turn up the heat.  It is important the temperature remains steady and all the ingredients are dissolved and well incorporated.  The temperature will need to reach 120C.  This will take around 30-35 minutes.
Remove from the heat and add the vanilla essence.  Keep stirring for another 5 minutes.  The mixture should be velvety smooth by this stage.

Pour the mixture into the tin and smooth over the top.  Do not refrigerate, leave to cool completely before cutting into squares.